Showing posts with label baffroom. Show all posts

Tuesday, February 2, 2010

Laundrovations

Once again we've embarked upon a home improvement project. We actually have a handful of them planned, some which can wait `til summer. Among our scheduled upheavals are redoing the OTHER bathroom, redoing the auxiliary sink area for the bathroom we already redid last year, and doing some rock facing repair outside. But the one we chose to tackle over the past week was a fairly quick one in which we would redo the laundry room. While not the ugliest room in the house (the title of which still belongs to the guest bedroom with its hideous wallpaper--oops, there's another project for the list) it could be a close second due to its sky blue painted walls and peeling vinyl floor. The plan was to get the washer and dryer and storage shelves out, take out the floor, put down ceramic tile, repaint, and put all the stuff back in there before my parents show up next week or before the dirty laundry topples over and kills us.

As much as a pain in the ass as redoing our bathroom had been, almost every step of redoing the laundry room has gone very smoothly. We'd budgeted thrice as much time as we normally would have, because that tended to be how long everything took with last year's project, but we almost never had to use the other 2/3 of time. Neat. We even bought a tile wet saw to speed up the tile cutting process. (Actually, we bought two wet saws, but the first one, a Craftsman, broke before we even had a chance to turn it on. The plastic guide bar that is supposed to clamp across its surface proved to have a clampy bit that instantly shattered when the wife tried to install it. We decided paying that much for a power tool that would break before we could even use it was not something we were willing to put up with, so back the whole thing went.)

Once the tile was laid and grouted, we had to come up with a complimentary color to paint the walls. The tile was whiteish sandy colored (I can't recall the actual name of the color, but it had white in it somewhere), but also had faint hints of a brown and a mauvey sort of color veined into it.

"Seems like we could use mauve," the wife said. "Only lighter." I was skeptical, cause if you lighten mauve, you get another color entirely. Plus, the first "mauve" she picked out was really more of a brown almost exactly the shade of a Wendy's Frosty. The wife soon assigned the task of picking a color to me, as I'm the guy who's had impressive success with the last two color choices for our house. Even I had trouble with it, though, and wound up buying five test cans of paint from Lowes before landing back on Twilight Mauve. It's actually a lighter shade of mauve, which turns out to be possible to achieve after all. (I know, I know, it's still mauve, but I promise it works. Oh, and I know, I know, it has twilight in the title which is also irritating given the images from popular fiction and culture that name now conjures, but I promise it works.)

"Get a gallon of kitchen and bath enamel," the wife said, two nights ago, before I went to pick up our paint. And a gallon of white kitchen and bath was what I did pick out from the paint aisle at Lowes and then haul over to the counter where they mix the color. The kid walked over to me and I pushed the can in his direction, my paint chip lying on top of it.

"I need a gallon of Twilight Mauve," I said.

The kid picked up the paint chip, then looked up at me with an expression I interpreted as saying, "Twilight Mauve? Really?" However, what he actually said was, "What sort of finish do you want?"

This threw me, because I was under the impression that the finish was determined by the type of paint you were attempting to mix color into--in my case Kitchen and Bathroom enamel. I don't buy a lot of paint, though, so I usually have enough time to forget all I ever knew about buying paint by the time its time to buy more, so this could be some additional part of the process I had forgotten.

"What are my choices?" I asked. Kid listed a number of choices, none of which was kitchen and bathroom. I chose satin finish as that was what all the test paints had come in and was not too shiny. A warning bell still tingled in my head, though, and as I began walking away to go look at some other supplies, I looked back to make sure that the kid had indeed picked up my can of kitchen & bathroom enamel to use. He picked it up, so I turned off the warning bells and didn't give it a second thought when I took the gallon can he passed to me a few minutes later.

Of course, it wasn't until we painted the entire laundry room that the wife announced she didn't think it was kitchen & bath enamel paint in the first place.

"Well that's what I bought," I said.

"Are you sure?"

"Yes, I'm sure. I picked the can of kitchen & bath enamel from the shelf and took it to the dude to color."

"This is not kitchen & bath," she said. "It's not shiny enough."

"That's because it has a satin finish," I said.

"I don't think that's how it works. Where's the can?"

Now here's where I did myself a GIGANTIC favor and just kept my my damn mouth shut. My my impulse, you see, was to snottily and with tones of defensiveness, reply, "It's in the garage. It'll be the can that says `kitchen & bath enamel' on it."

This I did not do, A) because it's an asshole kind of statement to make, designed to chastise my wife for seemingly doubting my word, and which would definitely have escalated into a fight; and B) there was always the possibility that I was wrong. Being wrong would have been far FAR worse than a mere fight, because an unbelievably asshole statement like that followed up with such a colossal failure of accuracy would live long in everyone's memory, be recounted in family stories for YEARS to come, and haunt my every step, perhaps even beyond death. So instead of shaking the asshole stick, I wisely went to fetch the can itself to see what it really was. The label on it read "interior satin finish."

"You're right, babe, it's not kitchen and bath," I said.

Despite it being completely the wrong paint finish, it still looks great, as does the floor. And, fortunately, I got the major part of the painting done in an afternoon, so we were able to move the washer and dryer back in and tackle some of the mountain of laundry that had piled up in the intervening days.

Monday, June 8, 2009

Potty Party (Our Baffroom Adventure Part 18)

This past weekend we threw our first major cookout bash here at Chez Juice, inviting friends and coworkers to pop by for a Potty Party. Yes, we threw a party in honor of our newly and finally finished potty.

Okay, so the potty still wasn't precisely finished when we scheduled the party, but one miter-box, saw and some pre-painted white wood trim strips later, not to mention an evening's work, and we finally had the trim set into place. (Note that I didn't say I nailed all of them into place, as the nails I bought don't seem to get along with our walls very well, so I gave up toward the end and just strategically placed the cut trim so as to look like it was affixed to the wall. I'll figure it out later.)

We've not had a party here before and had no idea how many people would show, so we wound up making a tremendous amount of food for it. We had loads of hamburger patties and hotdogs ready to grill, plus chips, hot dog chili and baked beans, but the wife also made potato salad, slaw, a massive fruit platter, bean & corn salad, and a huge banana pudding. In addition, she also cut up chunks of chicken, beef, shrimp, and veggies for kebabs, and even attached little jewels to the skewers so everyone would know whose was whose. Meanwhile, I laid in a stockpile of soft drinks, wine and beer.

Saturday evening people began to arrive and soon we had a whole house full of folks for Sadie to bark at. She was our major concern, because Sadie's something of a wild card when it comes to strangers in her house. She used to be a very friendly dog as a puppy and is still friendly with the people she met at that age, but anyone not on that list gets barked at. For instance, it took her an entire weekend to make friends with my sister during her visit in February. So Sadie barked ferociously at first, but after only a few minutes calmed down a bit and began making friends. Soon everyone was giving her dog taxes from their plates and a couple of guests even played Frisbee with her. (Her version of Frisbee is, "you throw it, I'll go get it and never give it back.")

All in all, we were having a great evening until one of our Tiki torches decided to blow up. The wife had bought new innards, wicks and safety caps for all the torches, but something went amiss with one of them and by the time my attention was called to it flames were spilling down the side of it onto the wicker body of the torch itself. One attendee attempted to put out the flames by pouring beer on it, which we all shouted at him to stop doing. I poured half a bottle of water on it, to no avail. Not wanting to see what would happen when the flames finished burning through the wicker and melted into the nearly full plastic fuel canister, I opted to yank the entire torch up and move it away from the wooden deck and our guests. How to put it out was not as apparent to me, though.

"SWEE, I NEED A TOWEL!" I screamed toward the house, hoping I could smother the flames with one. It then occurred to me that I had just the thing for putting out fires in the garage, whcih was a large bucket filled with rain water. The foolishness of carrying a burning object into my house to put it out didn't strike me at first, so I began running across the lawn toward the rear garage door. Out of the corner of my eye, I saw the wife arrive carrying a couple of hand towels and our laundry room runner carpet.

"Here," she said, offering the carpet. Trouble is, I really like the runner carpet and didn't want to see it damaged when I had a perfectly good bucket of water a few feet away.

"No, I got it," I said, still moving for the garage door. As I ducked through the door, I could see the amount of light my torch fire was casting and realized it had grown much larger than when I first started running with it. Probably all the air from running had accelerated the flames. What I didn't know was that it had at last burned through both the wicker and the plastic fuel canister and was likely going to begin raining hot burning oil down on me moments later, had I not shoved the flaming end of the torch into the water. Unfortunately, the act tipping the torch over to do this caused the top of the torch to come loose and the still-burning wick went flying onto the garage floor and rolled to a halt against the wall by one of our big gray plastic shelves.

The wife was outside, calling for me to bring the fire back out.

"I can't!" I called back, while trying to move the wick away from the shelf with the tip of my plastic flip-flop.

"Just bring it back out!" she said again.

"I CAN'T!" I screamed, still toeing at the fire. I did manage to move it away from the plastic and the wall, but it was still burning. Finally, I poured half the bucket of water on it and that put it out.

Only after thinking about my actions later on did I realize the full amount of foolishness contained within them. That could have gone REALLY poorly.

The rest of the evening went very nicely and both we and Sadie had a blast. She was sad to see everyone leave.

Friday, May 15, 2009

Oru Baffroom N Howss Adbvwnetru, 17 Again

On Monday morning, I phoned Suddenlink up again and was told a technician had already been assigned to me and would be coming by somewhere between 1p and 5p. At 3:30, he phoned and asked me what the problem seemed to be.

"Well, a big storm came through early Saturday and took out the modem," I said.

"What's it doing?" he asked.

"Nothing. It's dead," I said. "There are no lights on it whatsoever." I'd explained this to at least three other Suddenlink people and was kind of annoyed that none of them seemed to believe me and that they appeared to have not at least made note of my crazy claims for the guy in charge of fixing the problem.

"Is it plugged in?" he asked. Now, had he been there in person, I would have had to give him a long slow burn expression, but I imagine he does have to deal with people who are THAT dumb on occasion. I explained that, yes, it was plugged in and I had, as instructed by the Suddenlink tech help person I had phoned on Saturday, pressed the reset button a number of times to no avail. He said he would be out shortly and asked directions to the house.

Now here's the thing about directions to our house...

We moved to Borderland almost one year ago this month and no sooner had we moved into the house and had alerted all of our utilities, credit cards and magazine subscription-providers to our new address than the post office sent us a note saying that the address was changing to something completely different to comply with local emergency 911 service regulations. Essentially, the little four house cul-de-sac just off the much larger neighborhood main road became its own street. (And on that note, the street address changed from one that was plenty atmospheric to one that was well and truly bland; akin to if our address had formerly been on "Nightshade Lane" but then changed to "Dust Drive.") Still, we complied and alerted all our utilities and credit cards and magazine subscription-providers again. Trouble is, even after a year, no one BUT the post office can find us on a regular basis. It certainly doesn't help that there are still no "Dust Drive" road signs to actually help people find us should they make it up to our street, nor that the major databases uses by FedEx, UPS, Google Maps, etc. don't show us either. In fact, upon not being able to locate us recently, FedEx had contacted the local Emergency 911 to ask them the location of our street and were told that 911 didn't know either. Mmm, can you feel the love, devotion and security?

Because of all this, we've now become accustomed to giving directions to everyone and have simplified it by telling people that as soon as they turn onto Nightshade Lane they are to drive until they see houses on the right, the third of which is us.

"So, drive to the top of the hill and then the third house?" the technician said after I'd relayed the above directions. Never mind that my neighborhood is nothing but rolling hills and one could really argue where the "top of the hill" is, as opposed to all the other tops of the hills.

"No," I said. "Once you're on Nightshade, you drive until you see houses on the right and then we're the third one."

I then went outside and, after a few minutes, watched as he drove right past all four houses on the right and on up "the hill."

"Hey, you drove right past us," I said, after phoning him back at the number he'd phoned me from.

"I thought I was supposed to go to the top of the hill."

"No. We're the third house on the right."

Once the man had finally arrived in my driveway, he seemed to have a lot more on the ball than I'd initially given him credit for. He explained that our interruption in service was one of hundreds in the area and he and his brethren had been working nonstop. He took one look at the dark modem, pressed the reset button a couple of times, unplugged it a couple of times and saw that, just as I'd been telling Suddenlink for three days, it was dead.

"Aw, man," he said. "This is going to take four hours."

Whoa, I thought. Here I had expected it to be a simple switchout of equipment. Surely he didn't mean he'd have to be here for four hours? Turned out, this was not what he meant. Instead, he said it was possible that it would take four hours for the folks at Suddenlink central to get all the information from the old modem piped over to the new one. I could definitely live with that. He installed the new modem and phoned up his HQ to tell them to turn it on. He then said, "Do you have anywhere you have to be right now?"

"No," I said.

He then explained that if I didn't mind, he wanted to wait until 4p to see if SL HQ could get at least most of the connection reestablished by then. He said there was a chance it would take four hours but there was also a chance it would only take four minutes, it just depended on where I was in line. I said this was fine, then realized it was only 3:45, which meant we would probably have 15 minutes of waiting ahead of us during which I'd have to make small talk. To pass the time, I told him how our lack of internet had given us plenty of non-distracted time to put in our garage work bench and finish up some new bathroom renovations. That took all of thirty seconds, though, so I then described some of the problems in installing the new bathroom light. He commiserated with me on the difficulty of installing tile correctly and how renovations generally suck. Eventually, I realized I probably needed to shut up about the renovations, because sooner or later it wouldn't make any sense not to show them to him and that would mean leading him through our bedroom, which is still a total wreck.

At 3:59, both the internet and phone returned, just like we'd hoped and both worked.

I have to say that despite the delays in repairs, I am still quite happy with my Suddenlink service. As far as utility companies go, they've always been quite nice on the phone and on the rare occasion that I've had problems, such as some initial dropped calls with the phone service, they looked into it and fixed the problem. In fact, they've already offered me credit for the lost service due to the blowed up modem.

I still haven't seen Star Trek, though.

Wednesday, May 13, 2009

Oru Baffroom N Howss Adbvwnetru, Sweet 16

On Sunday morning, having heard nothing from Suddenlink despite being promised that we would, I gave them a call. They seemed surprised that we’d not been contacted, but pointed out that local offices probably had fewer technicians on the weekend and even fewer on mother’s day. They said they would put a dispatch order through to the local office and give them instructions to give me a call immediately about the situation. Going without internet was one thing; going without phone was another. (Never mind that I was calling them on a cell phone from my home, so it wasn’t like I was without communication ability.)

Early afternoon, we started on the new bathroom lamp.

We'd been in love with the new bathroom lamp from the moment we'd first seen it online. And, in person, it was just as impressive as we'd hoped. Our major theme in the new bathroom—beyond the muted green, white and earth tones color-scheme—is chrome and this light certainly qualifies in that department. It looks like three smoked glass flying saucers, each wrapped in a ribbon of chrome, suspended beneath two horizontal, deco-lookin’, curved chrome bars that are attached to a chrome wall-mount disc at the rear of the structure. It's a modern twist on classic design elements that we think tie in well with the antique-ish looking fixtures. (And, on that note, we even contacted Price Pfister about the fact that the sink faucet drain pull and the tub faucet drain pull, both from the same exact line of bathroom fixtures, DO NOT MATCH. They seemed surprised by this, but agreed to send us a replacement in the design we like for free. Yay Price Pfister!)

Naturally, as our lack of preparation had come to bite us when it came to the dimensions of the vanity, only after the light was in hand did it occur to us that it might not fit the space in which it was to be installed. Our new vanity is in the corner of the bathroom, and is more or less affixed to the wall with caulk and by the relatively immovable pipes beneath. We hadn’t measured the space before ordering the light, so it was very possible that the mid point of the light in relation to the side wall would be well to the left of the midpoint of the sink below it, throwing off our groove. Fortunately, things worked out well and it lined up almost perfectly, even leaving a little space between it and the wall. Unfortunately, we’d not counted on the fact that the three flying saucers hang well below the level that our crappy old single-bar light had previously, meaning the new lights would essentially hang in the face of whomever stood at the sink and would block off a great portion of any mirror installed there. We would have to raise the installation point with the wall, it seemed.

Again, though, the wires leading to the light were threaded down from the attic, so we knew we could raise it without much problem. We even went so far as to buy an electrical box in advance, which we thought we would need to anchor the light. Turned out, though, that there was a stud just to the left of the ideal installation point, which would have required the box be set in too far to the right for the light to actually fit in the space. Instead, we just cut a small roundish hole where we wanted the light to be installed, pulled a loop of the bound wires through it and, with the breaker securely turned off, cut it there. Then we affixed the lamp’s mounting disc to the wall, connected the proper wires and fastened the lamp housing to the disc. Super sweet. A short time later and we had all three lamps aglowing in their new home and the whole thing looked fantastic and cast a very cool glow over our carefully chosen cool color scheme. (The picture at right does not do the light justice, as the glow cast by it is not really yellowish at all and does not depict the color of the paint well.)

Late in the afternoon, having heard nothing from Suddenlink, I gave them another call. Again they seemed mystified that I had not been contacted by the locals, as the lack of phone service was an issue that was supposed to be moved on within 24 hours and we were already pushing 36. They said they would bypass all their previous methods (email, I think) and put a call in directly to our local branch and give them the what for. Hopefully, they said, we would be contacted very quickly. However, if we’d not heard anything by 7p, they were likely not going to come and would get to us first thing on Monday. And, of course, we heard nothing, so I was again stifled in my hope to see either a matinee of Star Trek or even the 7p show. We had to make do with takeout and an evening watching Slumdog Millionaire.

I really liked the movie, but found it difficult to watch the depictions of poverty and exploitation while sitting my comfy home, eating an Outback cheeseburger and drinking a Sam Adams while still whining internally about our lack of phone service for two whole days and how I'd missed out on spending what has become a stupid amount of money on movie tickets to see Star Trek.

(2 B Continued...)

Monday, May 11, 2009

Oru Baffroom N Howss Adbvwnetru Part 150

As you might have seen in the news, there’s been some nasty weather in my neck of the country over the past few days. It began on Friday night with what felt like some light rain that increased in heaviness as the night wore on. Somewhere in the wee hours of Saturday morning this turned into a thunderstorm, though the wife and I didn’t know it right away being as how we were asleep. Our first inkling that we were in a storm came when a bolt of lighting struck very close to our house, so close, in fact, that the very first thunderbolt we heard was of the deafening, pants-poopingly terrifying variety. I mean, imagine the two of us just snoozing away only to be awakened by what sounded like the end of the world. My wife later said that she thought a tree had hit the house, but noticed that nothing was shaking, whereas my first thought was “EARTHQUAKE!!!” before also realizing that nothing was shaking. Then the mighty burst began to recede and we could hear more thundery undertones to it (thundertones?) and our hearts began to beat once more.

Sadie dog was nowhere to be found in our bedroom, so we called to her and quickly she came dashing in from elsewhere in the house where she had, no doubt, been cowering in fear at what was probably her first major thunderclap like that. She climbed gratefully into bed with us and seemed pretty shaken, so we pet her and told her she was a good dog to calm her.

Of course, none of us were exactly sleepy after our scare, so we got up to make sure there were no flaming trees outside about to fall on the house and there were none.

The following morning, we decided to check the weather online and found that while the computer was fine, the Suddenlink cable modem, which also provides our telephone service, was completely off with no lights to be seen. A quick cell call to Suddenlink told us that they too could detect no signal from us and since telephone service is first priority with them they would send a tech out ASAP. We were told one should be in contact with us shortly. Great. There went my plans to go see Star Trek at a matinée.

With no internet or phones and with us being effectively trapped in the house, the wife and I began looking for projects. Oh, sure, we could fuss with the bathroom a little, but because our new over-the-sink light had not yet arrived, there wasn’t much we could do other than install some base-board we don’t have or put up the new bathroom door that we’ve been avoiding having to do, cause damn if we ever feel like doing the amount of precise measuring, drilling and chiseling that job will require. So the wife and I turned to the next major household project on our list, one which we’d planned to tackle immediately after the bathroom anyway—putting up some pegboard in the garage to hold all the new tools we’ve had to buy to put in this bathroom in the first place.

I’ve long wanted some pegboard in the garage, as the multiple plastic shelving units the house came with are full of tools and crap that take up valuable shelf-space that could be used to store other crap we’d rather not have in the house proper. My only problem is that I couldn’t decide the optimum location to put the pegboard. Nearly every wall had either plastic stack shelving or wooden bracket shelving in front of it or on it and there is a criminal lack of electrical outlets along the entire back wall. The wife, being a wise gal, suggested ditching all the shelving in one of the corners by the doors, mounting pegboard there and then combine the old bathroom vanity cabinet (which I’d been we’d saving for just such a use) and the old bathroom door (which I’d not considered using), to make a workbench. And almost without any hitches, this project worked like a dream. The old vanity, with the addition of some new 2x4 legs to increase its height, made for a perfect bench body and the old door made a great work surface, perfectly fitting into the space we wanted and made secure by the inclusion of some wooden supports on the unsupported end. With some prudent jigsawing, we also managed to fit in one of our old flat-pack bookshelves to hold power tools. Within mere hours we had a beautiful new workbench and pegboard area. I was frankly blown away by my wife’s genius idea and how simple it had been to turn one corner of the garage into a functional new area.

Then, as we were putting the finishing touches on the workbench and were rearranging the other garage crap (not to mention trying to find all the tools scattered throughout the house that now had a home on the pegboard), FedEx arrived with our new bathroom light. The wife wanted to install it immediately, but I talked her into waiting until after dinner, which we didn’t even get to until nearly 8 p.m. due to our finishing touches on the garage and the fact that at some point during the day one of the sensors on my remote controlled garage door opener stopped working meaning it would no longer raise and lower on command. We couldn’t find a break in the line or any evidence of a short, so we gave up for the day and left for supper. By then, I was pretty sure Suddenlink wasn’t going to show. And after we’d returned from dinner and set about installing the lamp, we quickly realized that it was a project that was not destined to go quite as smoothly.

(2BCONTINUED)

Wednesday, April 29, 2009

Rou Baffroom Edfinshur, Phrt Foruhteen

At long long last, our new baffroom is mostly finished. Well, okay, there's still a bit of work to do, but it's mostly cosmetic and can be accomplished in a weekend.

As I've mentioned, three weekends back we tiled the floor and a couple days later we grouted that mother. All was good and went off with only a handful of hitches and looked fantastic afterward.

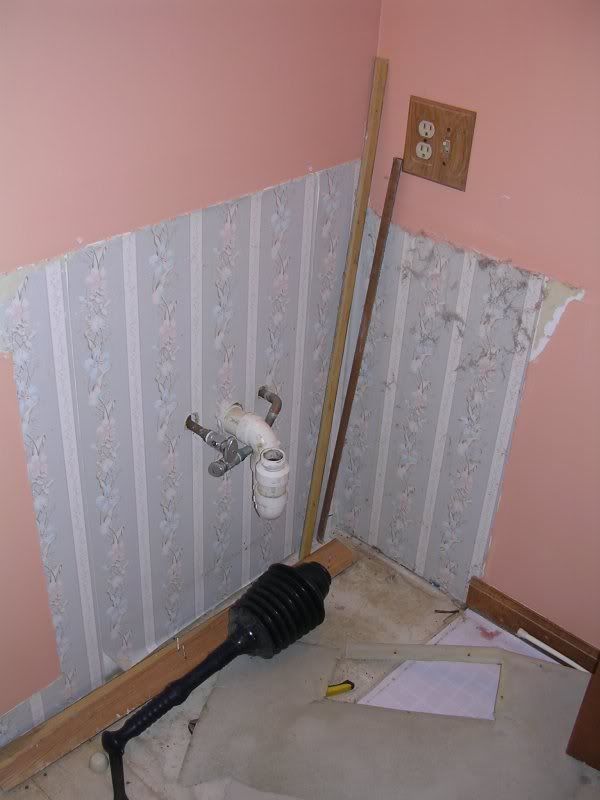
Keeping our momentum, two weekends back, we put up the sections of drywall we needed, installed a new toilet intake hose, put the final seal on our toilet flange, removed the old crappy pipes that formerly lead to the sink and installed two new water valves in their place. Of course, we didn't do all that in the proper order. The wife wasn't in the mood to do the drywalling, but really really wanted to install the toilet on Friday night, despite the fact that a major section of the drywalling was directly behind where it would sit. I argued that we should not only install the drywall first, but we should also paint it before the toilet was even brought in. If we had to pull it out to do all that, we were needlessly wasting effort. Didn't matter. The wife was determined that the toilet was going to be in place and working because this would represent accomplishing something that evening. The drywalling could wait a week. Sure, it would tear up the one wax ring we had to do this, but we could just get another. I hated the idea. It galls me to have to do the same job twice in nearly any circumstance, and I said as much. But there was also something to be said for not starting a major argument over something that, truth be told, was a fairly easy installation to repeat. So we put the toilet in. No sooner had we screwed it to the floor then it occurred to the wife that she had failed to remove the old rag she'd been keeping in the neck of the toilet flange to stave off fumes from the septic tank. We had to pull the toilet up to get the rag, which tore the wax ring and kind of took the gloss off our former sense of accomplishment. The next day, we did the drywalling and decided to leave the "terlet" until after painting.

This past weekend, we buckled down and committed to finishing as much of the bathroom as we could. To us this meant the installation of the vanity, sink and toilet and then paint the room. As always, we were of the opinion that these were each straightforward projects that would not take an unnecessary amount of time to accomplish.

Let me say a few words about preparation and planning. It's good to do them both and well in advance of beginning the project. Oh, sure, there's always stuff that comes up you didn't consider, particularly if you're an amateur at this sort of thing, as are we. However, when, say, , but there are certain things that should always be taken into account.

For instance: When shopping for a vanity that has been designed to look like kind of like a table with a sink on top and a drawer for wash cloths or butt paper or whathaveyou at the bottom, with the plumbing exposed between the two, it's often a good idea to measure in advance to know whether or not that plumbing will indeed fit there. We did not. (And I say "we" so as not to get in trouble--not that "I" would have thought to do so had "I" been the one to pick it out.)

As you might now suppose, we did not engage in said necessary measurements when we ordered the vanity back in December. And were a mite put out to discover our mistake at this extraordinarily late stage in the project. One trip to Lowes and a consultation with a knowledgeable plumbing guy later, though, and we had a new set of pipes to install that would pretzel around, allowing the water to flow out and for the pipes not to be resting directly on the lower shelf. We had already been planning to ditch the ugly old pipes anyway.

Our errors in preparation were not over, however. Turns out, not only did our new vanity not allow for the natural fitting of the pipes, but it was too tall for the electrical outlet as well, blocking half of it. We cussed and fumed for a while, then sat down to look at our options. Option #1: Shave off some of the legs of the vanity (not a good option, as they had the leveling feet built in); Option #2: move the outlet up the wall six inches. Fortunately, the electrical wires within the walls came from above, so we figured we could do it. It took a while to accomplish it and was not without its problems, but the finished product came out pretty well.

Before we installed the vanity and toilet, however, we did what previous asshole owners of the house failed to do and for which future owners of the house will sing our praises: we painted the walls behind them IN ADVANCE!!! Nothing huge, just a couple of coats in their silhouette. How's that for planning?

The toilet installation went pretty much according to plan. We put it in, attached the tank and other than a very brief leak that was fixed by tightening a bolt, it was good. I've never said this about a toilet before, but ours is a thing of beauty and grace and low water flow. The vanity installation took a lot longer and was rife with further complications. I'd rather not dwell on them. We survived.

This week I painted the room and was never so happy to see that awful shade of salmon keel over in the river and get flushed out to sea, having failed to spawn. The new color is a lot cooler and ties perfectly into the colors of the floor and the fixtures and the shower curtain upon which we based most of our color decisions in the room. At right is the work from this weekend.

Now all we have left is some caulking, finding a new mirror and new light to go above it, some baseboard to put in and various things like towel racks and shelves added.

Friday, April 17, 2009

A picture of two beautiful things (a.k.a. "Our baffroom adventure Part 13")


Pictured above is my freshly grouted baffroom floor atop which rests a nearly full Starbucks Coffee Keg lovingly gifted to me by my wife after being left over from a drug-rep visit to her office full of blessedly non-coffee drinking coworkers.

Tuesday, April 14, 2009

Oruh Baffroom Advainchur, Part Tuwelvuh

Keeping our momentum from last weekend going, this weekend we laid the floor tile. And like each step of this project has proven thus far, the job was both easier and harder than we anticipated and took quite a bit more time than we'd anticipated.

We knew in advance that we wanted to lay our tile in a diagonal pattern despite the fact that this would be, as I suggested, a pain in the ass to accomplish. It was, but I knew that if we could pull it off the results would be worth it.

Trouble was, tiling diagonally meant a lot more cutting of tiles. Compounding this was the fact that our cheap ass tile-cutter couldn't hack the floor tiles we'd chosen. We tested it with two Friday evening and while the cutter successfully split them, it did so in the wrong direction and without clean lines. Rather than waste more tile on practicing, we opted to drop $40 and rent a proper high-end tile saw, the kind with water and everything. It sliced right through the tiles like a water-cooled tile-cutter through tile, creating perfect, clean cuts.

After that we mixed up some mortar and began slapping them down in the pre-determined pattern. Well, I say pre-determined. We'd really only laid out a couple rows to show where some of the half-tiles would lay. After that it was pretty much wild west tile improvisation territory. Still, while I was laying tile down, the wife was running back and forth to the saw to bring me whatever size tile I needed to fit a given space. And, because I was using my tile spacers correctly, these were pretty much uniform pieces that made for a nice and evenly-spaced diagonal pattern.

Even with all the things going right for us, there were wrongs being accomplished all the same. Not only did I have to lay tile down into the raked mortar and make sure they were evenly spaced, creating parallel lines, I was also supposed to make sure they were all of the same height within that mortar. For the first half of the room, I did pretty well with this. After a long break, though, we came back for the second half--i.e. the more chaotic half--and keeping track of heights and depths took a back seat to filling holes before the mortar dried. The finished job was deceivingly good-looking, though, and it wasn't until we reexamined it Sunday morning that we found the trouble-spots.

One purchase of a tile puck later and we were able to find which tiles were the biggest offenders. Those we pried up, scraped off all the mortar on the floor beneath them, and then laid fresh new tiles down in their place. The finished product looks very nice. Sure, if you want to be nitpicky, there are some flaws here and there, but we tried to arrange for most of those to be covered up by baseboard.

Now we just have to grout it. And baseboard it. And put in the "terlet" and the sink. I have a feeling there will be much plumbing in my future next weekend.

Tuesday, April 7, 2009

Rou Baffroom Adwentier, Pert Elebmuh

Whew! We finally got the shower surround caulked and grouted.

They always warn you in any major home improvement project that you need to keep your momentum or you risk losing your drive to finish the job. This is very very true, as both I and my friend Joe can attest.

Back when Joe was a wee lad living near Starkville, MS, his parents purchased some land near the Longview community and proceeded to build a house upon it. They got the framing, wiring, flooring and most of the drywalling finished and then moved into the place, thinking that they could finish the rest of what needed to be done better from within. Moving took a lot of energy out of them, so Joe's parents decided to take a small break in the building process. At last count that break has lasted nigh on 30 years. From all indications Joe will have to finish the project when he inherits the home following their passing, some time in the future.

That lesson in hand, we were determined not to lose our momentum on the bathroom. After we got the tile in place, we decided to give the room a week or so for it to completely set before we could caulk and grout and then start on the floor tile. That was about a month ago and the most we actually accomplished from our list of things to do was the caulking.

Finally, this past Sunday, the wife and I decided to just go ahead and do both the grouting and our taxes, the two major projects we'd been putting off. Turned out neither task was all that painful. Now that we've finished the grouting I realize that it was an easy enough job that I could have done it by myself a LOOOONG time ago. But being the under confident soul that I am when it comes to home improvement and doing the job right, I wanted the wife to be there too, if only to share the blame if things went south.

And, continuing to build momentum again, as of today we've also cemented down both of the floor boards in preparation for tiling, installed the tub faucet and shower head (including the hand-unit for the shower), installed the shower curtain and hung up the shampoo holder hangy dealy over have made the tub pretty much usable. We've even tested it out.

Now we just have the rest of the room to do, which will commence later this week and through the weekend with the floor tiling. And just to make things more challenging... we're laying the tiles at an angle! (Could we live more exciting lives?)

Monday, March 2, 2009

Ar Baffroom Adventuer Part Tin

Despite no word here, the bathroom project has not been in drydock for the last couple of weeks but has been roaring along. We'd been waiting for all the tile we ordered to arrive and it took a good week longer than we'd expected. However, last weekend, I went and picked up what tile the tile store did have in stock and we began the adventure that is tiling up the new shower surround.

Neither of us have attempted anything like this before, but we'd read the DIY sites and some tiling books and had talked to the guys at the tile store to get their advice, so we figured we would be okay. And, ultimately, we were, despite our best efforts otherwise.

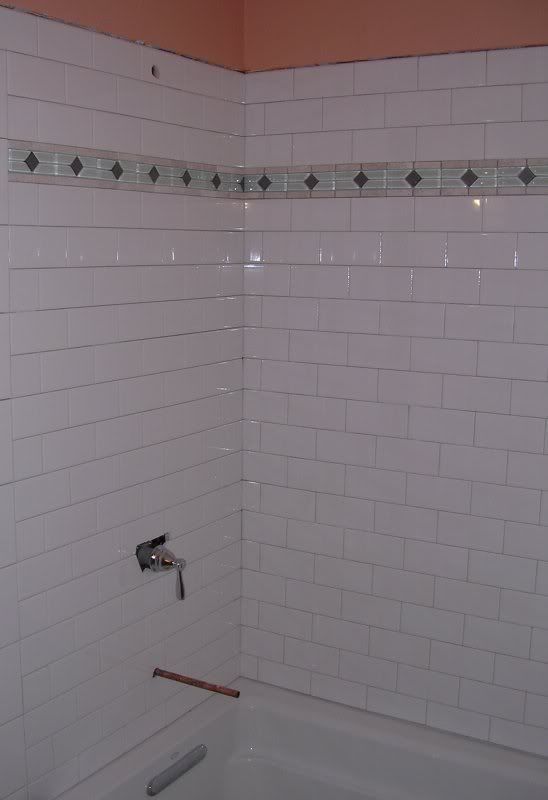
As I mentioned, we chose white subway tile of the sort that doesn't need additional spacers, cause the grout spacing is built into the design of each tile. However, because of the dimensions of the room, we knew we'd have to cut tiles in order to fit in the corners. So we bought a cheap tile cutter and learned how to use it. So while the wife cut tile, I was slapping them on the wall I'd freshly coated in a troweled layer of mastic and then trying to make sure they remained level and plumb. It wasn't easy. We had to start the first row a quarter inch off the tub itself to allow nails sticking out of the flooring and joists on which one might gouge one's head.

Upon my arrival at the site, I could see we were in trouble. The drain for the new tub sits in a somewhat different place than the old one, being as the drain itself is a bit further back from the wall and requires a long pipe to connect to the upper drain and then down into the plumbing. From my place beneath the tub, I could see that the drain was resting within a notch cut half-way into one of the floor joists. It wasn't touching the upper edge of the notch, but that was the surface that prevented the elbow we had to install into the drain from fitting. Because of the cramped nature of the area, I couldn't get my sawsall in there to carve any more of it out. That being the case, I knew I would probably have to cut through it using a piece of broken hack saw blade, which I also knew would take all afternoon.

After hacking at it for a bit, I came to another realization. In order to fit that elbow, it seemed to me that most if not all of the rest of the joist would have to be cut away. Before actually doing this, I went to fetch the wife hoping her advice would be sound. She crawled down there with me to look at the problem and decided that what we really needed to do was to chisel out more of, but not all of, the notch until we could fit the elbow in. As we don't own a chisel, we had to use a medium-sized nail-puller/crow bar and a block of stray wood to whack it with. It took a while with the both of us laying on our backs and trading striking duties from different angles, but we finally chiseled through enough to get the elbow in straight. Some PVC cement products were applied and the whole thing was ready to go.

But was it leakproof?

We had planned to use our first test-drive of the tub as a chance for the wife to take a nice soak, but instead we opted to just fill the tub with cold water. Once it had nearly reached the upper drain, I went out and crawled back under the house to check for leaks. I could see that it was leaking even before we tested the upper drain. Water was seeping out of the lower drain--not in a steady stream, but at least a good steady drip. Already it had puddled on the plastic beneath the house. Apparently when the tub drain had been knocked to one side it had lost some of its seal-power. Go figure.

Fortunately, according to the website of the plumber's putty we'd used, the stuff takes a good couple of days to fully set so we were still within a window during which we could remove the putty, reset the drain and seal it anew. And, after letting all the water out, this we did--the wife from above and me assisting from beneath the floor. Wall #1for proper sealing later, but the whole row kept sliding ever so slightly down the wall, dropping below the level start line I'd drawn. We finally had to prop them up with pieces of tile from one of our failed cutting experiments. In the end, though, they did stay put and gave us a level foundation that I was able to start building on. By the time I reached near the top, we decided to put in a decorative row of stone, glass and metal tiles, the stone of which matched our new floor tiles.

Wall #1I hit some more trouble on one of the side walls when I began relying more on the eyeballed vertically level nature of the tiles themselves and less on the carefully measured vertical line I'd drawn before starting the wall. By the time I reached the top the tiles were well inside the line. When I pointed out to the wife how strange this looked, she pointed out that I'd done it wrong. Fortunately, the mastic had not set and we were able to scoot the rows to the line, then cut new tile for the corner pieces.

The opposite wall, the one with the tub spout, valve handle and shower head, also proved a bit tricky, but nothing we couldn't tackle together.

By the time the basic surround was finished, we'd used four boxes of tile and had one full box remaining to take back to the tile store.

Finished SurroundThe bullnose came in this weekend and we set about installing them. This became even trickier, because we only had around 72 pieces of it, leaving very little room for screw ups. Then, due to the screwups that then ensued anyway, we wound up using every last piece we had down to the scraps. We got it all in there, though, and it looks pretty darn good.

Now all we have left is the sealing of the tub, the grouting of the tile, the tiling of the floor, the grouting of the floor tile, some drywalling, the replacement of the ugly plumbing that will be exposed beneath the new sink vanity, the installation of said sink and vanity, the installation of the toilet, towel shelf and shower curtain and the painting.

The further along we get in this project, the less work we feel like doing on the hall bathroom. By the end, we'll probably be in a mood to slap some new paint on it and call it a day.

Tuesday, February 17, 2009

Arr Baffroom Advencha, Part NIN

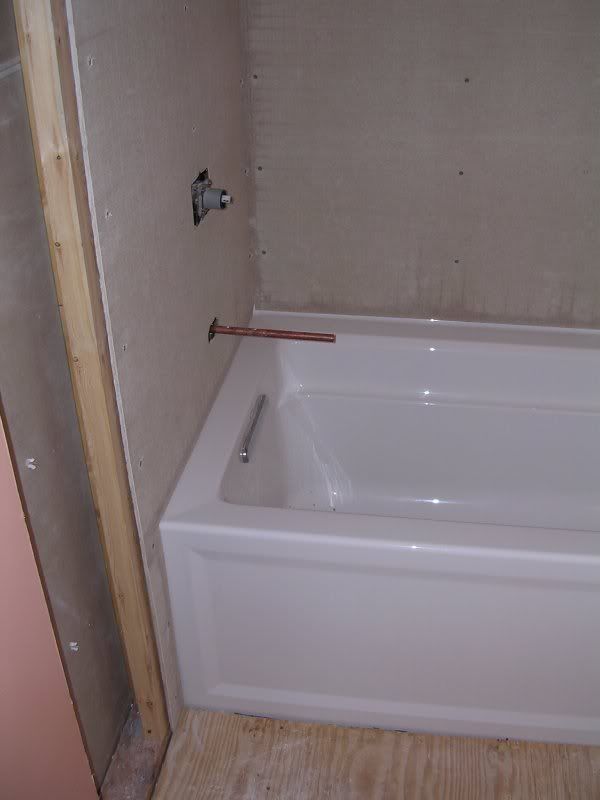
This weekend we put in the Hardiboard.

We chose Hardiboard over Durock cement board because... um... well, okay, I don't really know. I tuned out after about minute two of the five minute lecture from the guy at Lowes as to its advantages. But we were assured it was fantastic stuff, super easy to work with and would give us no problems at all. And while all of that might be true for some people, namely folks used to working with cement board who know what they're doing and who probably listened to the guy at Lowes better than we did, it was not true for us. This is not to say that we regret using Hardiboard over Durock, just that it wasn't exactly a party.

First off, it took me a long time to get over Hardiboard's texture, which is something akin to the surface of a chalk-board magnified by a power of ten. Simply touching it gave me the heebie jeebies, and I speak as a guy who is entirely comfortable in scraping his fingernails down a chalkboard. Touching Hardiboard was like scraping your hands across silk cloth, in the dead of winter, with no moisturizer, when they're good and rough, only in reverse. (And, let me tell you, after you'd been handling Hardiboard bare-handed for a while, you couldn't touch cloth of any kind.) I wound up wearing work gloves for about half of Saturday until my anger at having limited dexterity in the gloves (and the fact that the fingers of the gloves kept getting pinched between the board and the drywall) overpowered my discomfort and I forced my mind to get over it. After that, I didn't think about it much.

The second major drawback to Hardiboard was that it did not always live up to its billing as far as ease of use. We'd been told all you had to do was score the surface of it and snap it toward the score and you'd get clean lines with no worries. And, to some degree, this is true provided the sections you're snapping apart are both several inches wide. You work with anything smaller than three or four and there's a lot of breaking bits off one at a time with a pair of channel locks. I'm gonna give Hardiboard a pass on this one, considering that I'm the guy who was usually doing the snapping.

The other major drawback to Hardiboard is that it's deadly. It's made of silicate, which is basically sand, but microscopically fine sand held together by cement (or dog spit, for all I know). It's mostly harmless in board form (mostly, cause it is sort of rough and can cut you if you're not careful), but snapping it breaks some of that silicate dust free so that it can be inhaled. If it gets in your lungs, it can eventually cause cancer or pneumonia and so you're really not supposed to do much breathing around it. Furthermore, you're not supposed to sweep it up, cause that just stirs up the dust. So the only way to get rid of it is to vacuum it up (which I'm sure is also inadvisable, since I'm the guy who'll have to change the bag), or soak it up with a damp towel. The whole day, I kept imagining that my lungs were starting to burn and by late afternoon when I was hammer drilling the stuff into the bare flooring of the bathroom, I'd switched to a respirator.

All Walled UpOf course, as with nearly every step of our project so far, each part of this weekend's work took far longer than we'd hoped and revealed problems we'd not expected that we had to solve before we could move on, such as having to carve out even MORE drywall in order to toe in some new semi-studs that could support both the Hardiboard and drywall we'll eventually put there.

We also wound up smashing some valuables, of both the actual and sentimental varieties, we'd been storing on some display shelves attached to the other side of one of the walls. One of the items was an antique milk jar, the kind the milk man might leave on a doorstep, filled with even older antique marbles that had belonged to my grandfather. The marbles are fine, but the milk jar wound up vibrating off the edge of its shelf due to our hammer drilling on the other side, fell and smashed.

All Walled UpOur major problem, though, wound up being the position of the plumbing valve, as well as the pipes attached to it. It was not set far enough back within the wall to allow the new metal shower lever to sit flush against the backplate, as we preferred, so we wound up having to remove an entire section of Hardiboard in order to make adjustments. And even then, we had to calculate and recalculate the anticipated thickness of not only the tile we'll eventually install, but the mastic and gold coat that would sit between it and the Hardiboard, too. Kind of hard to do when you don't have the tile on hand to measure.

Fortunately, we've already ordered the tile, it's on the way and should be to us by the weekend. In the meantime, I get to Goldcoat waterproof the new walls in anticipation of the mastic and tile to come.

(TO BE CONTINUED...)

Tuesday, February 10, 2009

auwa baffromo hadfensur, part ate

Sunday afternoon, I crawled under the house with a box of tools to connect the tub's drain pipe to the plumbing pipes. I don't really mind going under the house, as it's remarkably clean down there and the soil is covered in plastic sheeting. It is, however, a very tight squeeze beneath the tub, with barely any headroom and lots of nails sticking out of the flooring and joists on which one might gouge one's head.

Upon my arrival at the site, I could see we were in trouble. The drain for the new tub sits in a somewhat different place than the old one, being as the drain itself is a bit further back from the wall and requires a long pipe to connect to the upper drain and then down into the plumbing. From my place beneath the tub, I could see that the drain was resting within a notch cut half-way into one of the floor joists. It wasn't touching the upper edge of the notch, but that was the surface that prevented the elbow we had to install into the drain from fitting. Because of the cramped nature of the area, I couldn't get my sawsall in there to carve any more of it out. That being the case, I knew I would probably have to cut through it using a piece of broken hack saw blade, which I also knew would take all afternoon.

After hacking at it for a bit, I came to another realization. In order to fit that elbow, it seemed to me that most if not all of the rest of the joist would have to be cut away. Before actually doing this, I went to fetch the wife hoping her advice would be sound. She crawled down there with me to look at the problem and decided that what we really needed to do was to chisel out more of, but not all of, the notch until we could fit the elbow in. As we don't own a chisel, we had to use a medium-sized nail-puller/crow bar and a block of stray wood to whack it with. It took a while with the both of us laying on our backs and trading striking duties from different angles, but we finally chiseled through enough to get the elbow in straight. Some PVC cement products were applied and the whole thing was ready to go.

But was it leakproof?

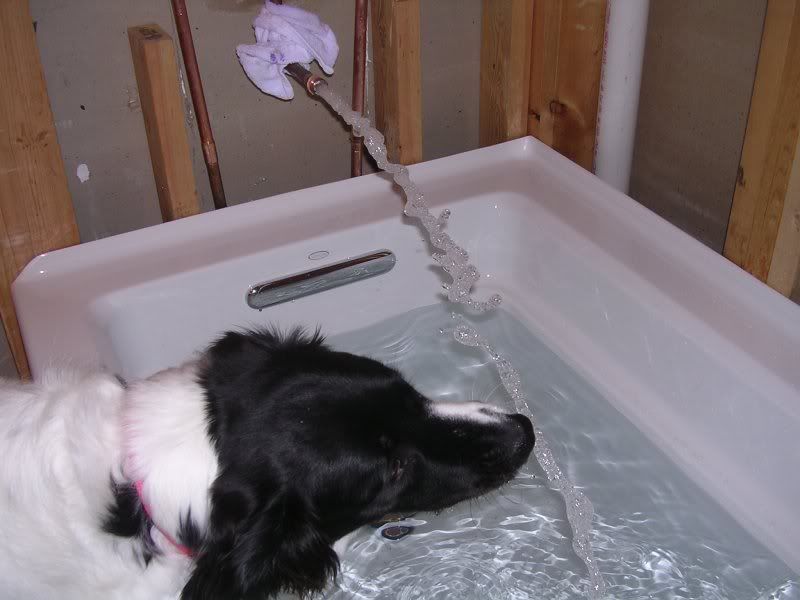
We had planned to use our first test-drive of the tub as a chance for the wife to take a nice soak, but instead we opted to just fill the tub with cold water. Once it had nearly reached the upper drain, I went out and crawled back under the house to check for leaks. I could see that it was leaking even before we tested the upper drain. Water was seeping out of the lower drain--not in a steady stream, but at least a good steady drip. Already it had puddled on the plastic beneath the house. Apparently when the tub drain had been knocked to one side it had lost some of its seal-power. Go figure.

Fortunately, according to the website of the plumber's putty we'd used, the stuff takes a good couple of days to fully set so we were still within a window during which we could remove the putty, reset the drain and seal it anew. And, after letting all the water out, this we did--the wife from above and me assisting from beneath the floor.

Testing the watersWe gave the whole thing a good 24 hours before doing any more testing, this time with a tub full of hot soapy water. The wife had a long soak and then I did. We'd both secretly been afraid that the new tub might suck, which would make all the work we'd put into installing it seem pretty foolhardy. However, any fears we'd had were washed away in that soak. Our Kohler tub is pretty damned awesome. It's probably the roomiest, most comfortable, deepest tub we could have chosen. In fact, I have to give the wife full credit, as she'd been the one to pick out the tub and do all the research on it.

Now that the tub's in and safe, we just have the rest of the bathroom to finish.

(TO BE CONTINUED...)

Thursday, February 5, 2009

Hour Baffroom Adwencha, Part Sebmuh

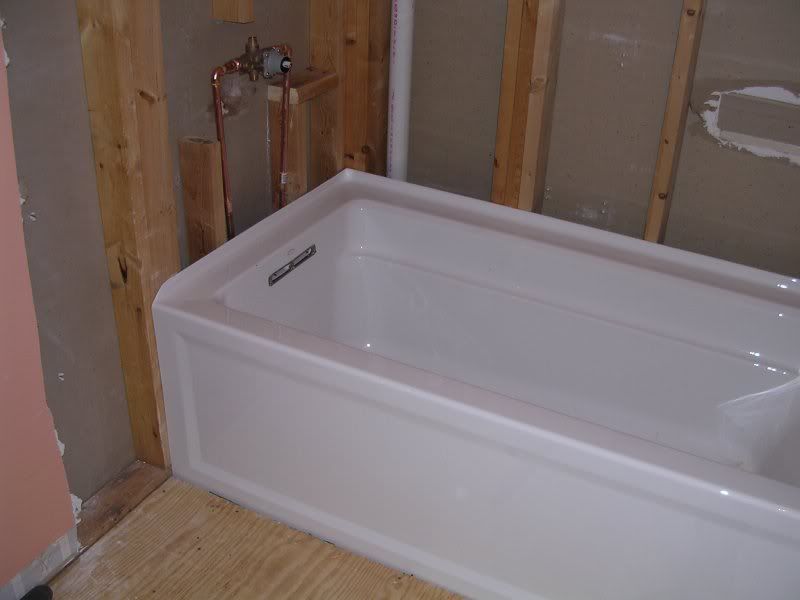
Crappy tub and mouse leavings GONEOn Sunday we installed the tub.

I don't know if it was sleeping on the matter for a night, but it occurred to me that we really ought to think about things very carefully before attempting the installation. Our last home-improvement project was putting in a roof vent for our oven-hood and that project had been rife with things done in an improper order, such as silicone sealant failing to be applied until after the roof jack was safely nailed down beneath the singles and final connections made to the vent pipe beneath, (and, also, things done in near complete darkness, on the roof, at 8p at night, in November). I wanted to make sure we didn't run into any of those issues, so before we even touched the tub we had a good long look at it to try and see what we were forgetting to do.

It came to us pretty quickly that while we had already measured and remeasured the existing hole in the floor that would house the drain pipe from the tub, and had cut it wider to compensate for this tub being bigger than the old one, and while we had also dry-fitted the drain pipe on the tub itself, we'd not actually sealed any of the pipes, nor cemented the pvc. It was the kind of work that we really didn't want to have to do AFTER the tub was installed, which would require a lot of maneuvering in the crawlspace beneath the subfloor and we were already going to have to spend enough time down there connecting the tubs drain to the actual plumbing beneath. So we did all that.

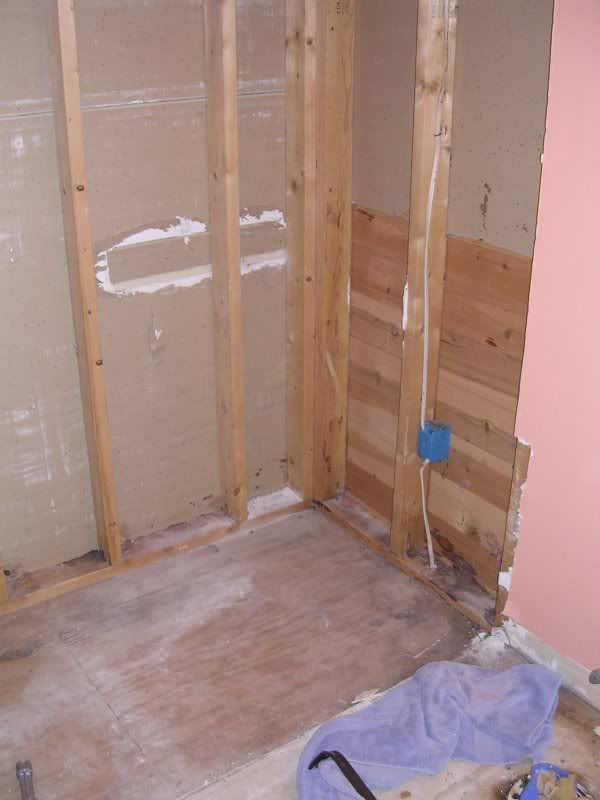
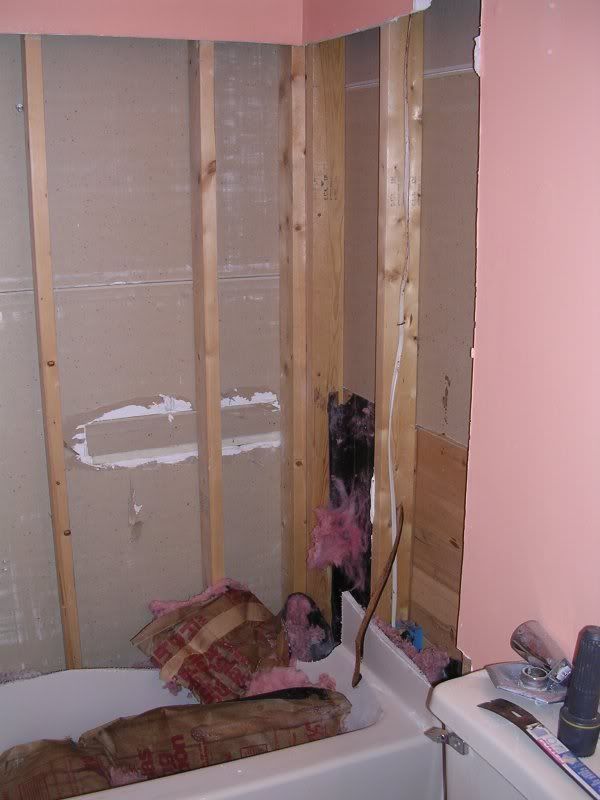
While it was setting up, we tore out the drywall in the bathroom to allow the front flange to rotate between the studs. Our tear-out job was not pretty, and will require extra drywalling work down the road, but it'll do.

Then it was time to install the tub.

"Okay," the wife began, as we stood over the tub where it lay in our bedroom, "before we do this, I just want you to know that I love you very much. And while I'm probably going to scream at you and you're probably going to scream at me, it's not because we don't love one another."

"Same here."

Then, true to our plan, we hoisted the tub up on one end, hauled it into the bathroom and slowly and carefully began the rotation process to bring it horizontal. It was very tricky business, because one sudden move might break off a piece of the fiber-glass coated acrylic flange and make us cry bitter tears. But ever-so-slowly, our plan to pass the flange between the studs worked and the tub became horizontal. Once it was, we then had to slide it back into place against the studs of the interior wall. Trouble was, I was standing there, holding up one side of it.

"Can you get out of there?" the wife asked.

"Just shove it on in here and we'll worry about how to get me out later," I said.

As she squeezed, I looked around and tried to figure out my options. The tub is huge and my stumpy legs weren't going to get me over that 32 inch chasm. As it stood, I had one leg planted literally within the back wall, between the studs, while the other was trying to brace against the studs of the adjacent wall so that I could attempt some sort of ill-advised acrobatics.

"Can you get me a chair?" I asked.

"I can't leave. I'm holding up the tub," she said. Then, keeping one hand on the edge of the tub and bracing the other against the stud beside me, she leaned forward and said, "Go over my back."

"What?"

"Go over my back."

"Are you sure."

"Yes. Go."

So I hoisted myself out of my position, tucked forward, put the edge of my right shoulder onto the left side of the wife's back, then put my weight into it, rolling onto my back, across the wife's back and then onto my feet on the other side. I felt like Chuck Norris. (Except that, as we all know, the real Chuck could have simply floated out by the power of his carpet of body hair caught an updraft from the toilet pipe.)

Old busted
After this, our job was a matter of getting the tub seated, level and glued down. Easier said than done with the tub fitting so snugly. In fact, we had to pull the tub up a tad and chisel out some of the plywood flooring so it would fit properly, resting atop the sub floor. What we didn't discover until after lunch was that we'd also bashed the drainage pipe in the installation process, pushing it to one side and causing the drain and drain plug to become uncentered. With the tub installed, however, we didn't really know anything that could be done about this and had pretty much resolved to become known as "those asshole former neighbors" in the eyes of all future owners of this house.

(TO BE CONTINUED...)

Tuesday, February 3, 2009

xiS traP, erutnevdA moorffaB ruO

Well, the tub is finally in, though only by the grace of God and a long-handled spoon. I won't go into a play by play of all of it. Just know that nearly every step of the process took at least three times as long as we hoped and all tasks undertaken in the crawlspace beneath the floorboards of the house took at least twice as long as that.

Here are some highlights from Saturday:

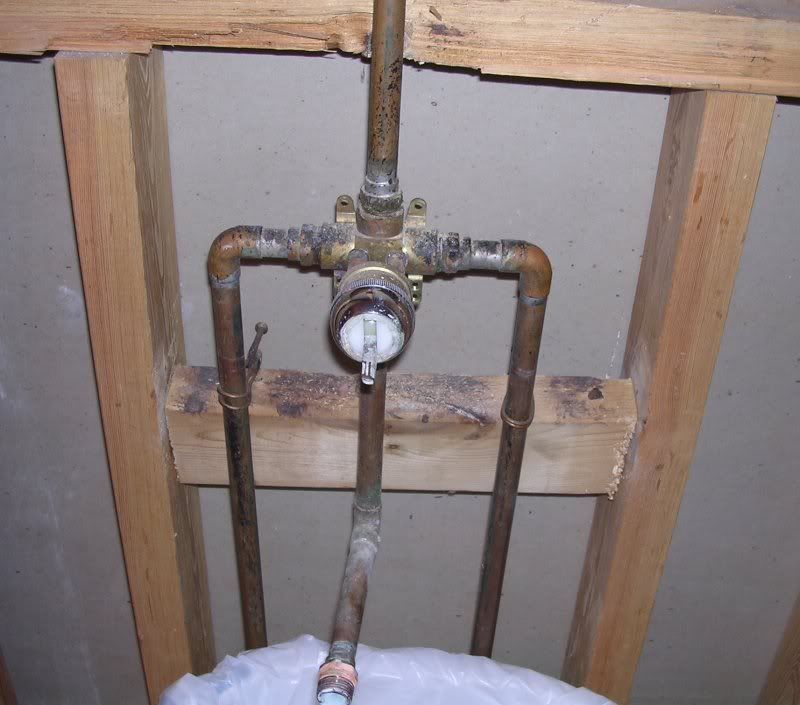
Old bustedWe tore out the valve system for the old tub and put in the Price Pfister valve. Easier said than done, of course. The new tub is taller than the old, so the whole valve works and tub spout had to be elevated from their previous positions, which required some sawing out of an existing stud, the connecting of copper pipes with other copper pipes using joint-connectors, joint elbows and special copper pipe epoxy that refused to come out of the two separated plunger channels in the equal amounts required. And though we'd shut off the water while doing all this, there was still some water trying to trickle out of the cold water pipe after we'd hack-sawed through it. To combat this, the wife stuffed a wad of bread into it, saying this was an old plumber's trick that everybody knows and will result in the bread dissolving and pouring out of the valve once we turn the water back on.

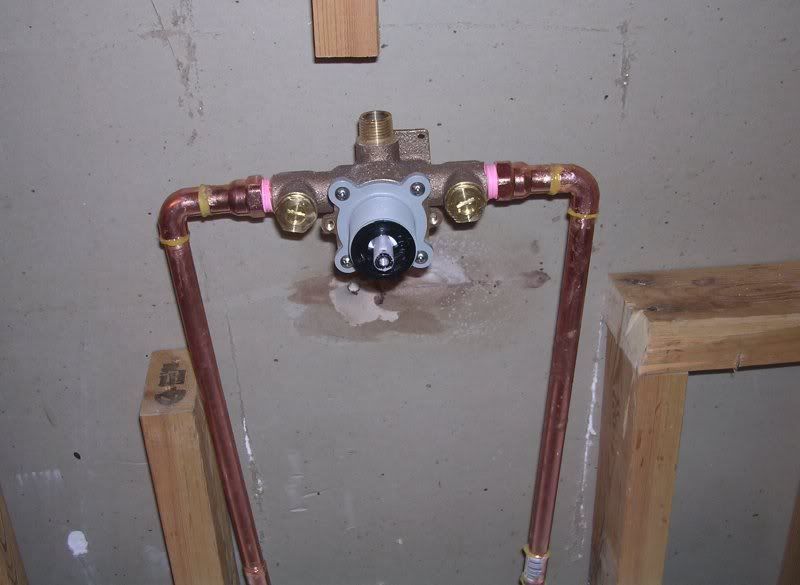
New hotnessAfter everything was epoxied and set, we turned the water back on to test for leaks. No leaks and both hot and cold water ran... at least, initially. Then there came a loud clunk from within the cold water pipe and it suddenly ceased to pour. Much theorizing and gnashing of teeth proceeded but the only thing we could think had happened was the wad of bread had clogged it. No matter how much we beat on the pipe to dislodge the clog, no water would flow. Eventually, we had to cut through it and run a coat hanger up it to poke around. Bread came out, as did a couple of balls of hardened copper pipe epoxy. Ahhhh. Seems we hadn't let the whole thing solidify enough before testing the works. We had to re-epoxy nearly every joint, because our surgery had broken almost all of the still uncured bonds.

The wife's idea was to put in the tub on Saturday night, but I knew well in advance that this was a losing proposition. The tub, as we already knew, was going to be a very tight fit which, if the dimensions provided and our measurements were to be believed, would allow no wiggle room whatsoever. Just getting it into the bathroom on its end was going to be a challenge, let alone rotated 90 degrees and lowered into place. And an addendum to those space limitations was the fact that the front flange of our tub could not be rotated the 90 degrees without passing through space currently occupied by the remaining drywall. Knowing full well how snippy the wife and I get with each other during stressful situations in which there's money and/or valuable new property on the line, I didn't think this was going to be a good scene even under the best of conditions. The knowledge that one false move might break our new tub would certainly put us on edge and I was pretty sure a fight would be inevitable. This, I pointed out and the wife agreed the possibility was high.

Instead of trying to install it, we settled for hauling the tub into the bathroom on its end, rotating it until the front flange hit drywall on both sides. Then we marked where the flange hit, that occurred, showing us where we'd have to bust the drywall out to, then we put the tub back in our bedroom and went to watch TV.

(TO BE CONTINUED...)

Friday, January 30, 2009

OurBaffroom Adwenchur, Parte de Cinco (Involving de Sinko)

Okay, I'm gonna have to stand up for this one and scream directly into the microphone.

Nearly all of the stuff we've ordered so far for the new bathroom has arrived. We have the tub. We have the toilet. We have the Price Pfister shower trim. We have the Price Pfister sink faucet. We have the Price Pfister shower/tub valve that all that Price Pfister stuff plugs into. We're still waiting for the actual sink and vanity, but we're not ready to deal with that anyway, so it hardly matters that it won't be here for another week. We also have yet to order the tile for either the surround or floor (which we'll have to install before putting in the vanity, so maybe we'd better get on it). And despite all our research and planning and phone calls to manufacturers to try and assure that we weren't ordering more chrome-coated EFFING plastic, this too has failed to happen.

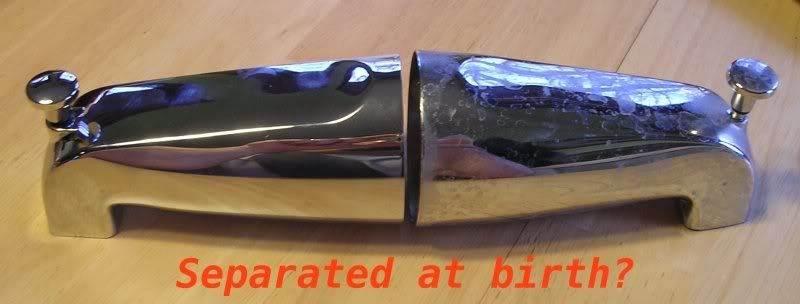
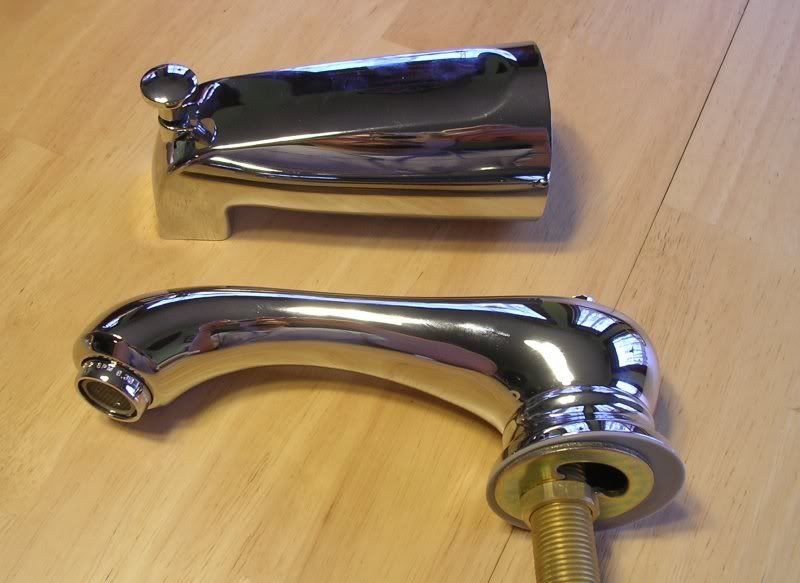
Separated at Birth?Let me start with the Price Pfister "Portland" shower trim, which I find to be decent stuff and have no real problem with the materials from which it is made. Okay, sure, the Price Pfister tub spout is visually almost indistinguishable from the $9 metal tub spout we bought for our previous tub that we just tore out. But, I'm not angry about that. At least it's metal. Also metal is the water control lever, all nice and heavy chromed brass. The shower head is chrome-coated plastic, but we knew that before we bought it, not only because it was described as "decorative" on the site we bought it from, but also because a Price Pfister customer service rep told us it was when we called to ask about the composition of their components two weeks ago. This is fine, as we'll be ditching it in favor of a hand sprayer, so, again, I'm not angry.

These are in the same line?Then, there's the sink faucet setup...

Oh, the faucet spout itself is beautiful, sleek, chromed brass of a size and shape that could probably bring down an elk. The fact that the tub spout bears no resemblance to the sink spout in any way despite being from the same "Portland" family of Price Pfister plumbing spouts--not even the drain plugs match--does mystify and annoy me. Again, though, not a deal-breaker and at least the sink faucet handles do match the water lever handle of the tub.

(Stands up, adjusts microphone)

As to the handles themselves, they are also composed of heavy brass. The same, however, cannot be said for the bodies directly beneath the actual physical handles. They are--all together now--chrome-coated EFFING plastic. Chrome, chrome, chrome, bop bop a-loo-bop...

Now, I will grant that no one will ever notice that the bodies are plastic because people touch the handles and not the bodies. Also, I'm not concerned with the plastic not being strong enough because the place within the body where the handle connects to the actual valve of the sink (the valve stem) is brass and directly molded with the handle itself and therefore not in danger of breaking like cheap-ass plastic might.

This matters not, for I am still angry with Price Pfister. Why? Because when we phoned Price Pfister two weeks ago to ask them about the tub components and their status as being A) Metal, or B) Not Metal, we also asked about the sink components and, with the exception of the shower head, we were told that all components in both sets met the conditions of A).

All metal
. Not half-metal. Not three-quarters metal. Not 19 seventy-fifths metal. ALL. METAL.

A return visit to Price Pfister's site reveals even less description about the composition of the faucet components than your average retail site. In fact, on their main page for the faucet, the only part mentioned to be metal is the popup for the drain plug. If you dig around in some of the downloadable .pdf docs it also mentions the lever handles are metal. Plastic doesn't come up as a subject in the Specification Submittals, the Parts Explosion, the Installation Dimensions, nor the Instruction Sheet. NOTHING! (I suspect some of the Code Compliances mentioned in the Parts Explosion might be layered there to somehow imply the presence of plastic. Too bad I'm not a contractor and don't know those codes.)

Another return visit to the site where I bought the sink setup, shows that the handles are described as being metal. And because they ARE metal, I guess I'm not supposed to be able to argue with it. I mean, they are. The handles themselves ARE METAL. I mean just because the handles are described as being made of metal and the handles turn out to be actually made of metal, why on earth should I therefore jump to the conclusion that the handle bodies, which are to me inarguably PART OF THE HANDLE and which clearly looks to be one single cast piece of metal in the picture, are ACTUALLY MADE OF METAL?!!!!!

Sure, the partially metal faucet handle will probably work just as good if not better than one completely made of metal. I DON'T CARE!! I'm the guy who's gone the extra mile to be a good consumer, here. When the usual sources failed to provide the needed information, I phoned the MANUFACTURER and then they too failed me. But the fact that I had to phone them at all is the real crime. How hard is it to list what your shit is made of? The vagueness of the description on the part of not only Price Pfister but nearly every online retail company I've looked at while shopping around, strikes me as an ass-covering move. They hope you'll go ahead and buy the chrome faucet set that they've been able to make more cheaply by using plastic for some parts, but they know that you probably don't want those plastic parts so they just don't list the composition of ANYTHING substantial
so you can't accuse them of lying. (C'mon, Price Pfister, you list the EFFING popup as being metal but not the faucet?)

I tell you, it's a conspiracy against
DECENCY!!!! What the hell kind of cheap-ass, fast-food culture, corner-cutting (nay, corner-violently-SEVERING), customer-deceiving world are we living in where THIS kind of thing is standard operating procedure?!!

Pfuck a monkey!!!


(Breathes heavy)
(Goes away and takes long walk and plays "stick" with dog)
(Comes back)

After penning the above and getting good and worked up about it, I realized I didn't really have anywhere to go with this story beyond that. We've waited so long for all these parts to come in and can't really install the tub without some of them. Because of that, I'm pretty sure we're both willing to suck it up and get over the plastic handle-bodies just to get the project moving again. But while I'm willing to get over it, I can't just let it go--if that makes sense.

I decided to phone Price Pfister again to let them know they had a very unhappy customer due to what I'm calling The Deceptive Practices of the Plumbing-Fitting Industry in Which They are Clearly Willing Participants. I doubted it would do any good, but at least my complaint would be heard by someone who might be able to roll it uphill to those responsible for the situation.

I spoke to a nice lady in customer service and politely and calmly told her the chain of events that led me to call, spelling out how we'd first called Price Pfister about component composition before ordering two weeks ago. She asked again what model I was talking about. I told her.

"Oh, no, those are made of plastic," she said, referring to the handle bodies. I conceded that she was correct, they were plastic, but noted again for her that this is not what Price Pfister had told me two weeks previously, nor was it reflected in ANY of the documentation available on their site nor any retail site I've found so far.

The customer care rep then explained that "everybody" makes those parts out of plastic.

"Not Delta," I told her. In fact, the faucet handles were about the only thing Delta had gotten right.

The customer care rep then asked to clarify that my basic complaint was that I didn't want faucet handle bodies made out of chrome-coated plastic. I replied that no, I did not, nor did I want any components made of chrome-coated plastic. She then asked if I had made any attempt to look at my choice of faucet set in a store to test and see what they were made of before ordering. I explained that I had indeed gone to Lowes to do exactly this but that the Portland model was not sold at my local store, hence why I had phoned Price Pfister to ask in the first place. (I've since been back to Lowes and found that all the Price Pfister faucets on display had completely metal handles. Apparently my set is the odd man out.)

The rep then tried to explain again that it was far more common these days for companies to manufacturer components out of plastic. I told her that I understood this and had had many problems finding ones who didn't--hence, again, why I had PHONED THE MANUFACTURER to ask in advance of ordering.

The phone rep then started up again on the commonality of chrome-coated plastic, so I had to interrupt her.

"Ma'am, as far as I'm concerned, Price Pfister is completely free to make faucet handles out of whatever materials they so desire. I just really REALLY prefer it greatly if they would make note of which parts are plastic on their website when they do and that they don't tell me plastic parts are made of metal when I call and ask them point blank."

The customer care rep, adopting an appeasing tone, agreed wholeheartedly that my complaint was a good one. She could see from her own display that this was indeed the case, the website didn't mention it, but she didn't know why. However, she assured me that she would shortly alert her supervisor about it. He couldn't do anything about it himself, of course, but he could pass the word along to those above him, who could then pass the word along to those who who could make decisions and maybe, just maybe, they would do something about changing the website. She also admitted that it didn't speak well of Price Pfister customer service if their representatives were giving out false information. Mine, she assured me, was a valid point. After reiterating all of the above twice more, she paused and I was finally able to bid her good day.

It was not a satisfying call. In fact, it left me feeling like I'm the only person this matters to. And maybe I am. I mean, looking around my office now, I see an awful lot of plastic, some of it even chrome-coated. None of it's cracking and flying apart. It holds up, it's sturdy and will be around long after we're all dead. Why should it matter?

It matters because it's not what I wanted, it's not what I was told I'd get when I asked, it's therefore not what I paid for and to my mind it's not right.

(TO BE CONTINUED...)

Friday, January 23, 2009

Arr Bafffroom Adwenshur, Pahrt Fo-ruh

So after we got the bathroom pretty much torn out to our satisfaction, we went ahead and ordered a new drain system for the new tub (cause Kohler wants it that way) as well as new fixtures for both the tub/shower and the sink/vanity. Really, we should have done all that back when we ordered the tub and toilet, but the whole project just didn't seem real enough until they were in hand.

We decided to go with chrome fixtures, which we thought would look good with the white tub, white toilet, white vanity and white subway tile we plan to use on the tub walls. (Our plan is to go with a creamier colored tile for the floor, though tiling in general is still a ways down the line at this stage.) So I dug around on the `net and found some chrome fixtures I liked by Delta in their "Leland" line. They looked old-fashioned enough, but with a bit of a curve to them that spoke to their non-vintage roots. We ordered them through Faucet.com and, amazingly enough, they came with free shipping and were actually in our possession the very next day, having been shipped from a supplier in Virginia.

The sink faucets set was beautiful all around and were just the sort of big old, shiny, solid brass fittings with a satisfying heft we were going for. The Delta "Leland" tub/shower set, however, lacked almost all of that. Oh, they looked nice enough, but both the shower spout and the tub spout were composed of chrome-coated plastic, reducing their coolness factor dramatically. Now, I don't guess I really expected the shower head to be solid brass, but it should at least have been a thinner, lighter metal of some sort. The tub spout, on the other, had no excuse at all. In my opinion, it should have been the same solid, heavy, chrome-coated brass as the sink spout, but the only part of it that was metal was the diverter knob. And the only piece in the entire shower trim kit that was indeed heavy brass was the water flow handle.

I immediately went to Faucet.com and checked the entry. No where in it is there any indication that either the tub spout or shower head are anything but metal. Granted, the only part the entry specifying any part of the system as being composed of metal was the water flow lever handle. Even when you took a look at the product specifications .pdf, written by Delta themselves, under the Standard Specifications section the phrase "Solid Brass Fabricated Body" is listed. What exactly this description applies to is not readily evident, until you look at the other items in the list and realize it's only describing the water flow lever. There are no descriptions of the tub spout nor the shower head, nor their composition in the entire document. One is left with little recourse but to assume that they are as metal as they appear to be in the pictures.

Now, I don't know if this omission in the text is Faucet.com's fault. Frankly, I think Delta is to blame as they're the ones supplying all the item descriptions on their faucets. But we were still pissed off enough to call up Faucet.com and ask them, "What's the deal?" The person we spoke with seemed astounded that we would have assumed a chrome-coated, apparently metal faucet was actually made of metal. He also seemed mystified that anyone might expect their online entry to actually specify the composition of any of the parts. In the end, though, he did offer to take everything back and issue a refund. He even said he would waive Faucet.com's usual 15 percent restocking fee, (a fee which, while listed on their website in the Returns & Cancellations page, to me flies in the face of their Satisfaction Guaranteed page where they promise "no surprises").

Next we phoned Delta and asked them "What gives?" They too seemed perplexed that we would assume a shiny, chrome-coated, metallic-looking tub spout would not be made of plastic. Furthermore, they said they were unaware of any other tub manufacturer that actually made metal tub spouts. Horse-Effing-Ess!

True to their word, though, within hours we received an email from Faucet.com with a Return Number we were supposed to include with our faucets when we sent them back. Infuriatingly, in their comments section, it noted: "Customer to return, waiving restock as customer upset because components were plastic and they were not aware of that." I was tempted to write in: "Customer was not aware components were plastic because YOU JAINKEE, MONKEY-EFFING BASTARDS DIDN'T EFFING TELL US!!" but refrained.

So there we sat, feeling angry and betrayed. The trouble was, we couldn't quite tell if we'd been betrayed by Delta, Faucets.com or by our own lack of knowledge of faucet manufacturer standard terminology. Perhaps it was normal to expect anything not specified as being metal to be made of plastic. After all, the Leland sink faucet entry had spelled out that it was made of solid brass. Looking around at other faucet sites, the vaguery continued. Even somewhat higher end brands such as Price Pfister and Kohler didn't seem to specify component composition. Were they plastic too? And, furthermore, if all manufacturers worded things this way, was this some sort of conspiracy to get us to shell out good money for plastic?

(For the record, I'm sure the plastic tub spout would have worked perfectly well. If yours is plastic, then go with God. My beef isn't really that plastic faucets don't function exactly the same as metal ones, but that I really wanted a metal one, thought I'd ordered one and felt as though I was given the bait and switch by The Man yet again. That and I also admit to a prejudice against chrome-coated plastic on a conceptual-level. I can't stand just about any "faux" item manufactured of cheap materials designed to appear of higher quality--i.e. Cubic Zirconium, fake brick sheeting, pleather, Paris Hilton, etc. Just makes me angry. Plus, when I was a kid, any toy I had made of chrome-coated plastic wound up breaking prematurely because that particular mix of plastic was always far more brittle than regular, rubberier plastic. I mean, did anyone out there actually own a Super Powers Brainiac action figure that didn't have an arm eventually break off?! [Little known fact: Brainiac can't kick without arms.])

To assuage my paranoia, the following day I headed to Lowes to have a look at their tub spouts, figuring I'd be able to touch a few and tell which ones were made of what. Imagine, if you will, the chill that ran up my spine when I saw that that each and every tub/shower trim display was located on the upper most tiers of Lowes' gigantic shelves, well out of reach of the average human being. And the few boxed sets of them stocked on shelves below were sealed in a double-layer of thick plastic packing straps, preventing me from simply opening the box to inspect.

IT WAS A CONSPIRACY!

Before I could commandeer one of Lowes' giant rolling staircases (the kind with signs on it telling customers to stay the hell off of it), and touch all the display models anyway, the wife phoned and said she had a five second window in which to go to lunch and asked if I wanted to join her.

Over lunch, I told her of my suspicions of conspiracy and that I thought Price Pfister might be in on it, too. I'd seen some of their tub spouts that I liked the design of, but they were suspiciously higher on the shelves than the Delta spouts. She seemed dubious, but couldn't argue so much in the face of my evidence. After lunch, we phoned Price Pfister and asked them point blank if their tub spouts, specifically the Portland model, were metal. They said they were and seemed surprised that we had to ask. We explained that Delta's weren't and that they'd told us no one made them of metal. Price Pfister said they were surprised at this, too. They didn't go so far as to call Delta a bunch of jainkee monkey-effing bastards, but we could tell they were thinking it. And later, when perusing Price Pfister's site, I noticed that they did call attention to the metal construction of the tub spout and lever, but noted that the shower head was "decorative," indicating to me that it was chrome coated plastic.

We ordered the Price Pfister Portland trim set, after all. It might have a decorative shower head, but I don't care because we were probably going to replace that with a hand-sprayer anyway. I even found a set very cheap on ebay. I won that auction a week ago. We're still waiting for it to arrive.

Monday, January 19, 2009

Awur Baffroom Advenchur, Part Free

Crappy door knob
Tub and terlet in hand, we had no more excuse for not starting the work on the bathroom itself, which meant tearing out all the old crappy things we didn't like, such as the old tub/shower, the terlet, the vanity and, eventually, the 80's above-sink makeup lights. (Oh, and the super crappy rigged doorknob setup, as pictured at right, the only explanation for which I can imagine is that some genius locked themselves out of the bathroom at some point and had to cut the original knob out of the door in order to get back in. Not to say that I haven't done nearly this very thing since moving in, but I at least had the good sense to climb in a window after failing to pick the lock from the other side of the bedroom door.)

Crappy Vanity GONEThe crappy shimmed up vanity was the first to go and was easy enough to remove. Its departure left a vanity-shaped section of wallpaper exposed, once again showcasing the half-assedness of one or more sets of the previous asshole owners of our home. (Can't really say I would have done things much differently, but that doesn't diminish their assholity.) We hauled all the bits of it out to the back deck, except for the cabinet itself,which I put in the garage for future incorporation into my super-cool garage tool bench setup.


Crappy door knob
Next up, we began the removal of the tub. We knew this would be tricky, because it's not like you can just pick up the tub and haul it out, what with it being drywalled into place, hooked into the plumbing and likely glued to the subflooring beneath. Not knowing the best way to otherwise do things, we decided the easiest method was to demo the whole thing using a sawsall. And this we did, being careful not to cut through studs and floor and wiring. It was slow going, one piece at a time, but, as you can see from the accompanying pictures, we took her out to the studs.

Crappy tub and mouse leavings GONEThe truly unsettling part of all this, however, is that with each piece of tub we removed, we exposed another section of the inner walls of the bathroom and the evidence of a one time mouse occupation there. We saw no actual mice, but their leavings were numerous and disturbing. We were glad to have respirators, so as to breathe as little of the mouse-poo dust as we could. Previous owners, or perhaps the contractors that built the place, had tried to seal up a hole in the subflooring where the pipes entered the room from the crawlspace beneath our house, but some of the screening had been damaged or eaten through, allowing the mice access. The good news is that most of the subflooring looked pretty good, but there were a couple of spots that would need to be replaced.

Our overall plan was to replace the sections of subflooring we needed to, put down some concrete planking atop that, seal it, install the tub, put up more concrete planking around the tub, seal it too, patch some drywall, tile the walls above the tub, tile the floor, install the new toilet, install the new vanity and we'd be home free for a new bathroom. Of course, accomplishing all of the above would have taken us a goodly amount of time, even if things had run exactly to plan. Naturally, they haven't.

(TO BE CONTINUED...)